Last week I left off my cannon with a first pass through substance painter.
This week I went back in, reduced the reflection on the model and added a layer of color to the canon's mouth.
Using the export function of substance painter I created a series of maps that captured the different channels composing this texture. I uploaded the model to UE4 and connected the textures into a single material.
Showing posts with label 3D Art. Show all posts
Sunday, October 14, 2018
Monday, October 8, 2018
3D Materials and Substance Painting
Baking a high poly zbrush map into maya and painting it over with Substance painter.
Adding base metallic layer
Adding a powder coat layer and a base paint.
Painted a logo, and used a texture brush to add fine detail
Lastly throwing a layer of dust and painting edits on the normal faces for a studded look.
Monday, October 1, 2018
3D Cannon UVs and High Poly Details
This week we add additional high poly details and map more standardized UVs to our previous cannon asset.
We start with the game poly model we ended with last week.
Using a mixture of planar and cylindrical mappings, we start to layout and scale our UV faces.
After breaking the model down in a manner that allows our seams to hide on the underside of the model, and make cohesive sense UV work space, I scaled the pieces to form a consistent pixel resolution throughout the model.
After our UVs were created, we worked on our soft poly mesh model, and added geometry on our corners to allow the cannon to maintain its core shape.
Once satisfied with the high poly mesh, I converted the soft poly model to actual geometry and exported the cannon out as a .obj file.
Opening my export in Zbrush, I began working on adding finer details to the mesh.
I wanted my cannon to look like it had been through countless battles and had earned every crack and scar across its surface. I scuffed the edges, rusted down metal, and added large cracks running throughout the model.
Once my additional details were completed, I decimated the model down to roughly 2 million polygons in Zbrush and ended with a visible map of the additional geometry.
We start with the game poly model we ended with last week.
Using a mixture of planar and cylindrical mappings, we start to layout and scale our UV faces.
After breaking the model down in a manner that allows our seams to hide on the underside of the model, and make cohesive sense UV work space, I scaled the pieces to form a consistent pixel resolution throughout the model.
After our UVs were created, we worked on our soft poly mesh model, and added geometry on our corners to allow the cannon to maintain its core shape.
Once satisfied with the high poly mesh, I converted the soft poly model to actual geometry and exported the cannon out as a .obj file.
Opening my export in Zbrush, I began working on adding finer details to the mesh.
I wanted my cannon to look like it had been through countless battles and had earned every crack and scar across its surface. I scuffed the edges, rusted down metal, and added large cracks running throughout the model.
Once my additional details were completed, I decimated the model down to roughly 2 million polygons in Zbrush and ended with a visible map of the additional geometry.
Sunday, September 23, 2018
3D Modeling a Cannon
This week we will be modeling a simple prop, a cannon for an alien pirate ship. We will specifically be focusing on creating the proxy version of our prop.
We first set up our scale. Using the model exported from UE4 we scale our reference imagery to the height we want when seen in game.
Using the reference imagery for size an shape, I went about creating a proxy object under 1000 polygons.
Once the model was combined and mended together, I generated a set of automatic UVs for this proxy. We will go into greater detail on the UVs in a later week, but the auto function will work for our testing.
With everything now ready for export, I created an FBX of our cannon and pulled it into UE4 for scale comparison and making sure our faces render properly.
From here, we can render out final details and render out our wire frame.
Using the boolean functions, I can cut additional shapes out of my cannon model.
With the final edits to our cannon placed, and our polygons reduced, we can use the render tool to produce a clean view of our cannon in wire frame mode.
We first set up our scale. Using the model exported from UE4 we scale our reference imagery to the height we want when seen in game.
Using the reference imagery for size an shape, I went about creating a proxy object under 1000 polygons.
Once the model was combined and mended together, I generated a set of automatic UVs for this proxy. We will go into greater detail on the UVs in a later week, but the auto function will work for our testing.
With everything now ready for export, I created an FBX of our cannon and pulled it into UE4 for scale comparison and making sure our faces render properly.
From here, we can render out final details and render out our wire frame.
Using the boolean functions, I can cut additional shapes out of my cannon model.
With the final edits to our cannon placed, and our polygons reduced, we can use the render tool to produce a clean view of our cannon in wire frame mode.
Sunday, September 9, 2018
3D Lego Project
For the next two weeks, our team will be working together to create and build a scene out of lego blocks. We chose the Battle of Helm's Deed in the Lord of the Rings universe to create. My assignment particularly will be to help build the ballista used by the Uruk-Hai army.
The first unique piece of this set I will need to create, will be the front wedge plate that covers the ballista wagon.
To start off, I created a simple 6x1 block using the dimensions and scale established by previous cohorts.
From there, I expanded the width of the piece out by 3 block units and roughed in a general shape of my wedge plate. This would likely be a good proxy object to send out for testing during a larger assignment.
Once this basic shape was complete, I used the extrusion tool to hollow out the inside, and add connection pegs from basic cylinders.
With the shape complete, I cleaned up the shading on my intended "hard edges" and created a small bevel around the shape to better fit the overall "Lego" style.
Once it was finalized, I combined all the individual elements of the piece, and uploaded it into the project's perforce and UE4 libraries.
Game Res Version
The first unique piece of this set I will need to create, will be the front wedge plate that covers the ballista wagon.
To start off, I created a simple 6x1 block using the dimensions and scale established by previous cohorts.
From there, I expanded the width of the piece out by 3 block units and roughed in a general shape of my wedge plate. This would likely be a good proxy object to send out for testing during a larger assignment.
Once this basic shape was complete, I used the extrusion tool to hollow out the inside, and add connection pegs from basic cylinders.
With the shape complete, I cleaned up the shading on my intended "hard edges" and created a small bevel around the shape to better fit the overall "Lego" style.
Once it was finalized, I combined all the individual elements of the piece, and uploaded it into the project's perforce and UE4 libraries.
Game Res Version
Monday, September 3, 2018
Minecraft-ish Wold Project
Our assignment this week is to design construct, texturize, and landscape a minecraft inspired scene using Maya, Photoshop, and Unreal.
To start, we create the base building block of our new world. Just like our previous 3D cube assignment, we use Maya to create a basic cube primitive.
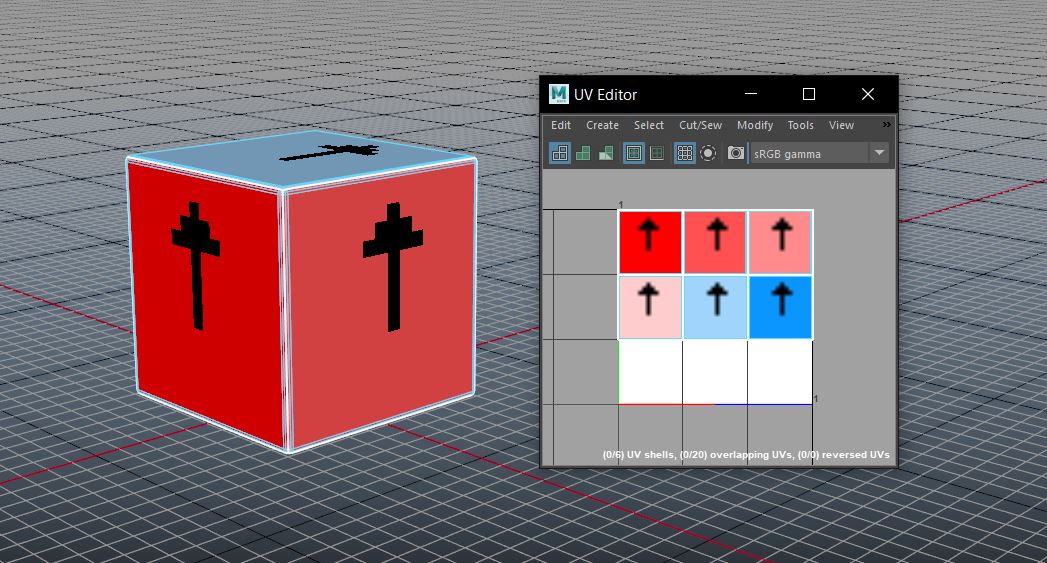
Using the Maya UV editor we can see the base split of our cube's UV map. After adding a bevel on the cube and rearranging the UV layout, we are left with a UV map that is a bit easier to work with and understand in Photoshop.
I then took this UV layout and generated a basic texture blueprint in Photoshop. Using color tones and directional arrows, I made sure the UVs I had mapped in Maya were labeled and oriented in a uniform and concise manner.
Using Maya's hypershader tool, I tested the shader on my cube and ensured the end result would be a clean wrap around my cube.
Once I confirmed everything was properly mapped between Maya and photoshop, I set out to create a variety of different minecraft-inspired textures for my cubes.
One final check in Maya to ensure these textures would provide the look I wanted before moving into UE4. Everything looks good to go!
Now into the Unreal engine. I begin building my scene with a base grass layer. For this project, being a tribute to minecraft, I want to recreate one of the survival modes in that game that I used to love. In my project I will be building a basic skyblock platform. This floating island gives the player very limited resources to survive on, and it is up to their ingenuity to create a sustainable world to later grow and expand on.
I start by building a grass platform.
Adding some depth, I add a layer of pure dirt blocks.
Supporting this platform, next up is a layer of floating rock.
Add a small pond for the player's crafting recipies
All that's left is to add some final touches. A tree for wood and saplings, and a chest of starting tools for the player. Our skyblock map is now complete!
As our map is intended to be floating in the middle of the open sky, I decided to not add much atmospheric fog, or any horizon elements, as the vast emptiness is part of the iconic challenge of a skyblock map.
An extra close-up shot for a bit of scale.
To start, we create the base building block of our new world. Just like our previous 3D cube assignment, we use Maya to create a basic cube primitive.
Using the Maya UV editor we can see the base split of our cube's UV map. After adding a bevel on the cube and rearranging the UV layout, we are left with a UV map that is a bit easier to work with and understand in Photoshop.
I then took this UV layout and generated a basic texture blueprint in Photoshop. Using color tones and directional arrows, I made sure the UVs I had mapped in Maya were labeled and oriented in a uniform and concise manner.
Using Maya's hypershader tool, I tested the shader on my cube and ensured the end result would be a clean wrap around my cube.
Once I confirmed everything was properly mapped between Maya and photoshop, I set out to create a variety of different minecraft-inspired textures for my cubes.
One final check in Maya to ensure these textures would provide the look I wanted before moving into UE4. Everything looks good to go!
Now into the Unreal engine. I begin building my scene with a base grass layer. For this project, being a tribute to minecraft, I want to recreate one of the survival modes in that game that I used to love. In my project I will be building a basic skyblock platform. This floating island gives the player very limited resources to survive on, and it is up to their ingenuity to create a sustainable world to later grow and expand on.
I start by building a grass platform.
Adding some depth, I add a layer of pure dirt blocks.
Supporting this platform, next up is a layer of floating rock.
Add a small pond for the player's crafting recipies
All that's left is to add some final touches. A tree for wood and saplings, and a chest of starting tools for the player. Our skyblock map is now complete!
As our map is intended to be floating in the middle of the open sky, I decided to not add much atmospheric fog, or any horizon elements, as the vast emptiness is part of the iconic challenge of a skyblock map.
An extra close-up shot for a bit of scale.
Sunday, August 26, 2018
3D Cube Project
To kick our school work off, we are tasked to work with
basic shapes in both Maya and Unreal Engine 4. The star of today’s project will
be a simple beveled cube. We will take this primitive structure, give it a few
different materials, and see if we can create something fun with it.
To start off, we need to establish scale. Using the
mannequin from the Unreal Engine, we can get a good feel for our basic cube
building block’s relationship to the world around it. The block we will be
using for the majority of this project is roughly a 10 x 10 x 10 cm cube.
Adding a little character to this cube, we will add a
bevel to its edges.
Exporting our cube from Maya we now get to play around with
materials. Below you can see a few iterations of these materials when playing
around in the UE4 material instance manager.
The materials for this project will combine scalable values
for the block’s color, metallic expression, specularity, roughness, and
emission. Seen here in the material editor, with these values established, we are
able to generate multiple different instances to produce near-limitless
material variations for our cubes.
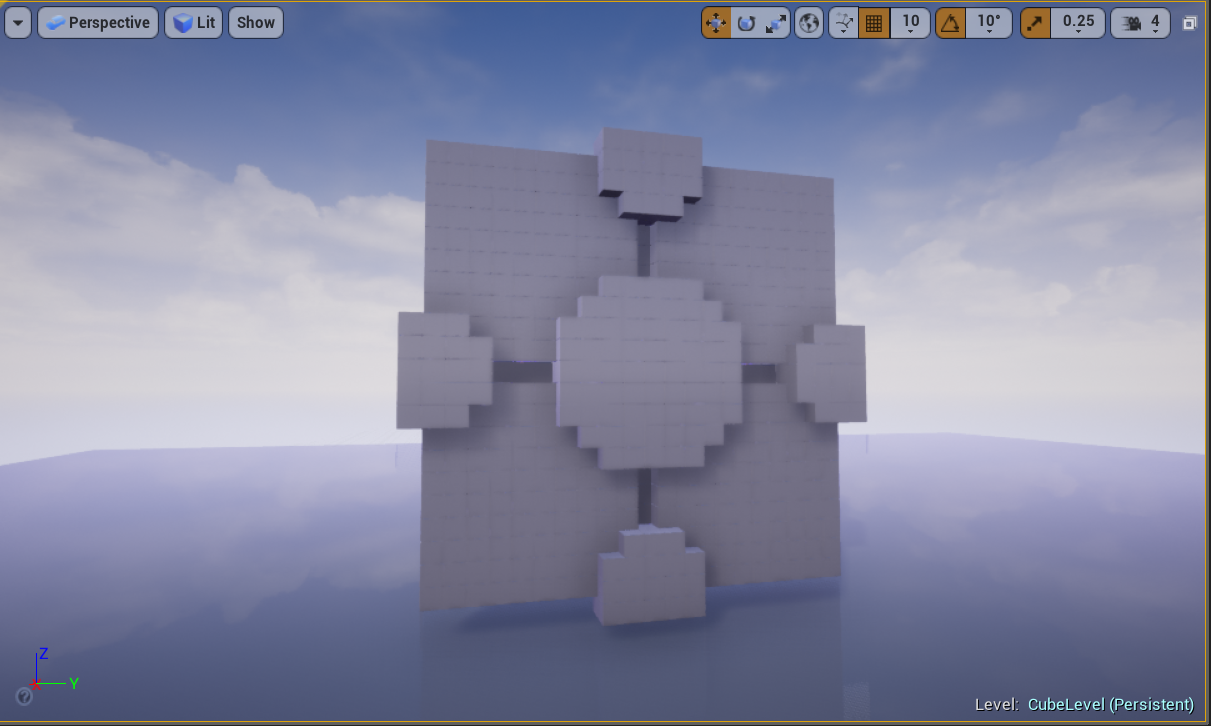
Now we begin the building process. Using grid snapping to
keep dimensions proportional, I began creating the base structure for my object
of choice. Any guesses what it could be yet?
One side done! Time for some material assignments. After
generating a few new instances, I am happy with the color palate I was able to
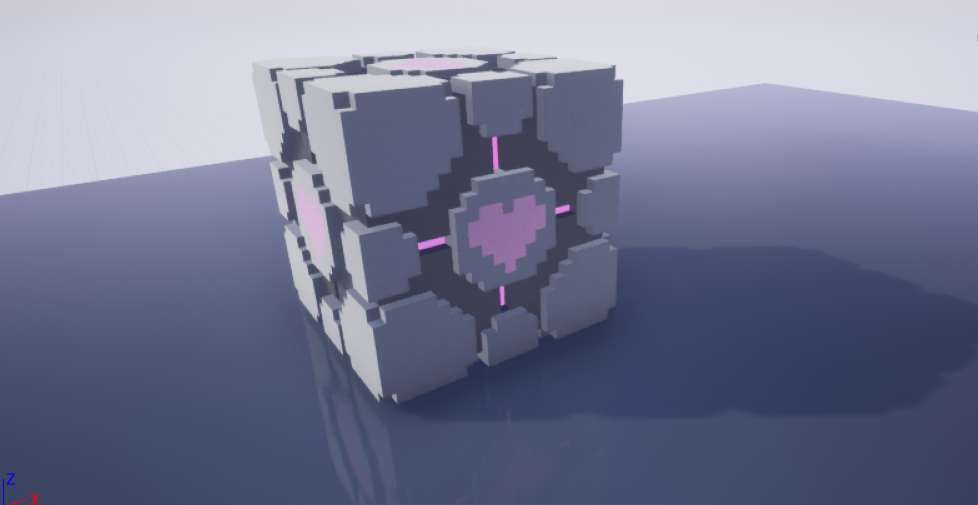
generate. Our object should be recognizable at this point. I wanted to pay
homage to the humble cube, and what better way to do that than reconstructing
everyone’s favorite testing buddy: the companion cube!
A little over 5000 cubes later, and our testing companion is
complete! Our cube has taken shape and is ready for a bit of atmosphere.
I threw an atmospheric fog of darkness over the world and
constructed a few testing panels to place our little companion on. A simple
setting, but its dark/mysterious setting fits the lore of Portal, and I wanted
the focus to remain on the main cube.
Subscribe to:
Posts (Atom)